
I'll be honest... The first place my husband and I lived in together was a craphole. The bathroom was Pepto Bismol pink, the shower was more of a utility sink that you could barely turn around in, since it was New York, there was an abundance of roaches and the ventilation system was such that when the upstairs neighbors sang "I Believe I Can Fly" every time they did karaoke (which was often), we felt like we were being given a private concert. But the fact is, it was our first place together. Yeah, it was pretty gross, the commute wasn't great and the basement had a definite "Blair Witch" vibe, but to us (or me at least), it had a certain charm because we were happy there and starting our relationship. It had potential, just like us.
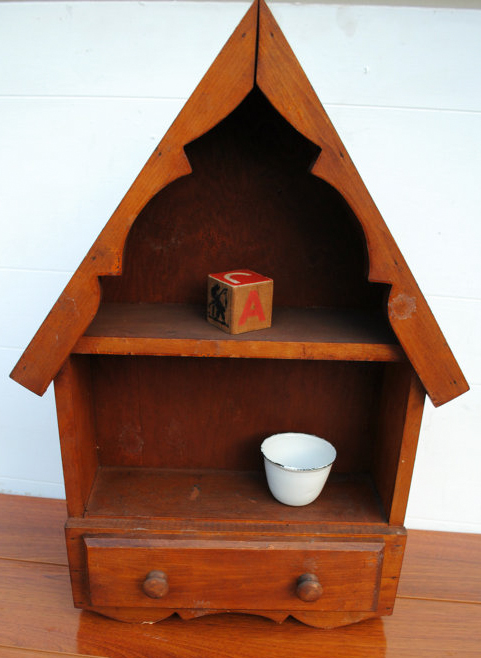
My husband teases me that I can find beauty in anything and I suppose this is true. My 2010 New Year's resolution was to try to be more optimistic and I've been true to my word, always trying to find the good and let it outweigh the negative. So when I saw this little rickety curio shelf, slightly sticky, slightly off-kilter and in need of some love, I knew I could make that happen. I decided to get my upcycle on.

I've done cosmetic rehabs to a few pieces of furniture - my nightstand and a living room cabinet most recently. You could do this with any item in your house because they now make spray paint for almost any surface. Clean it up with some mild soap and water (I used the Soak I usually use for my knitting), let it dry, sand it a bit, wash it again, let it dry. I hit it with 3 coats of spray paint for wood, letting it dry overnight between coats. I had intended to replace the knobs, but they proved unwilling to budge, so they got spray painted, too. But it still needed something...

I LOVE the Paper Source. I could spend hours in that place. I found some amazing fox paper there, bought 2 sheets and ran home to fit it into place. The paper backing took the longest, but really makes this shelf go from being a curio shelf to a curio shelf with panache. I glued the paper in and let it dry overnight. I then took out one of the best inventions EVER - Mod Podge. 2 coats later and this sucker was ready to live in my son's room and house a few special treasures.

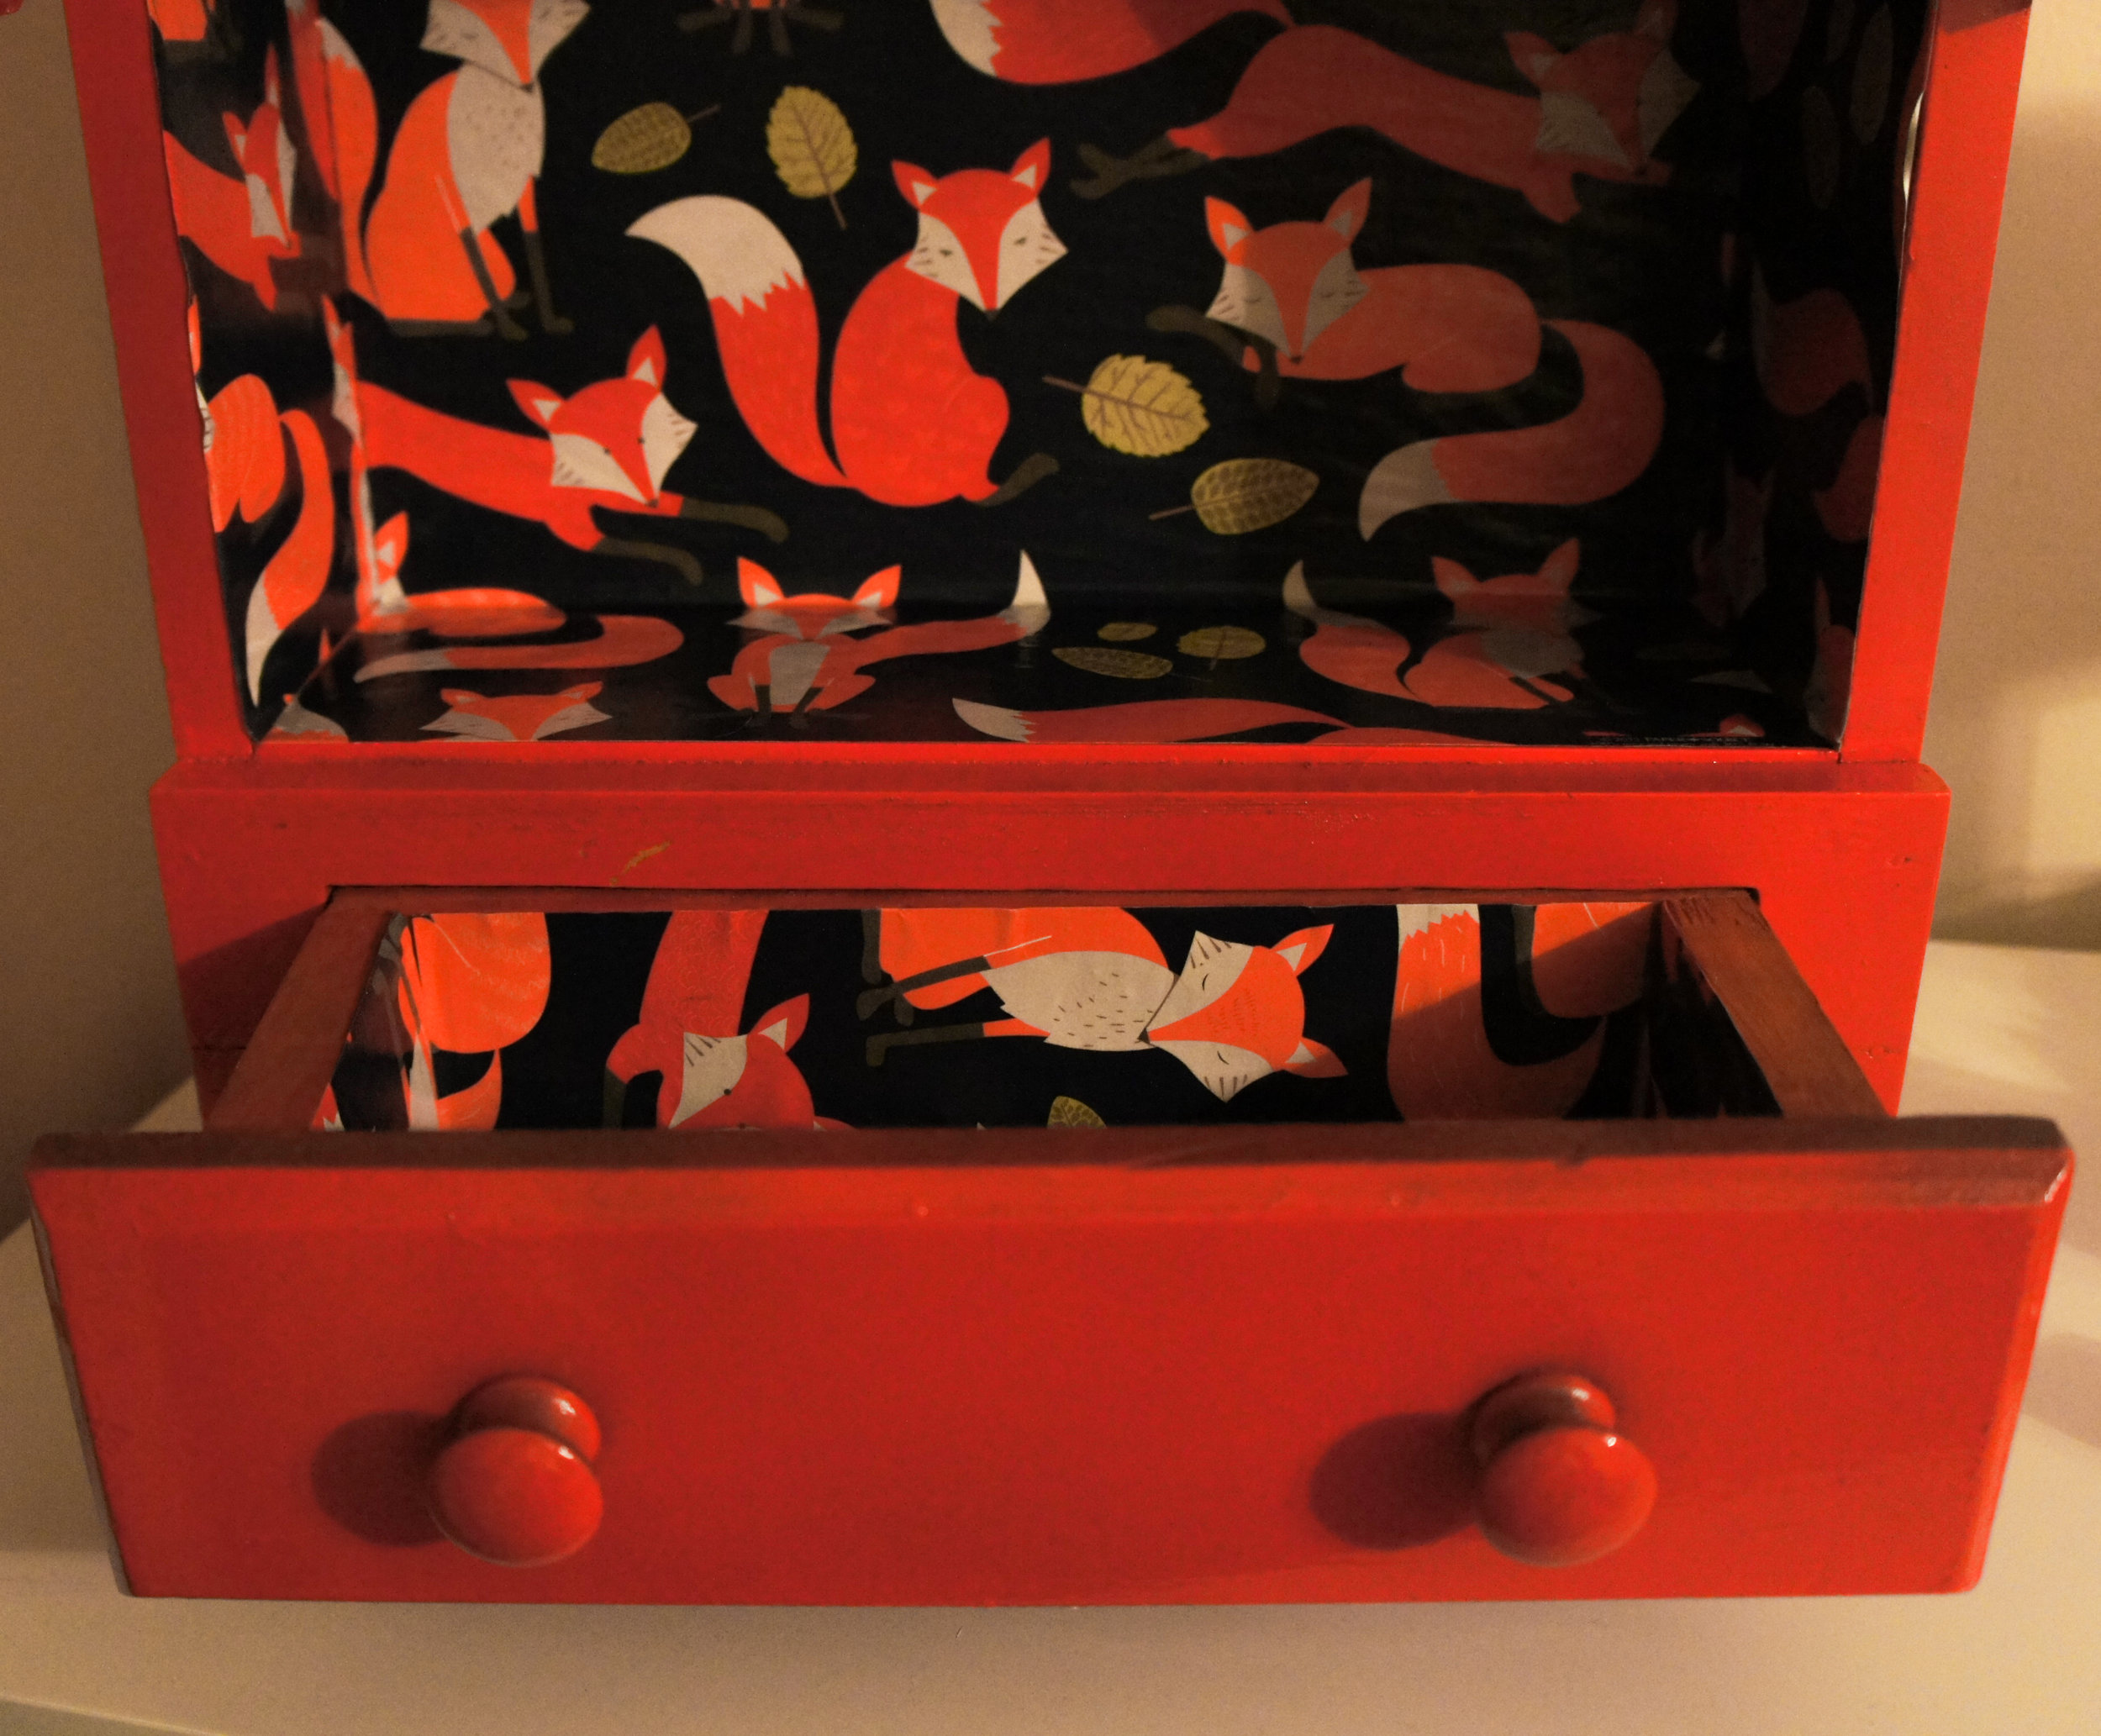
The whole process took a week, but it was mostly dry time. The shelf was $7, spray paint was $8, paper was $4. I had the Mod Podge and the sponge brushes. I'm a big believer in if you can do it yourself, then DO IT YOURSELF. Also, why go buy a new shelf when I could just fix one up for under $20?
 Long live upcycling!